Part 1: Create a Project
In this part, you create a new Valsight project and define its time horizon.
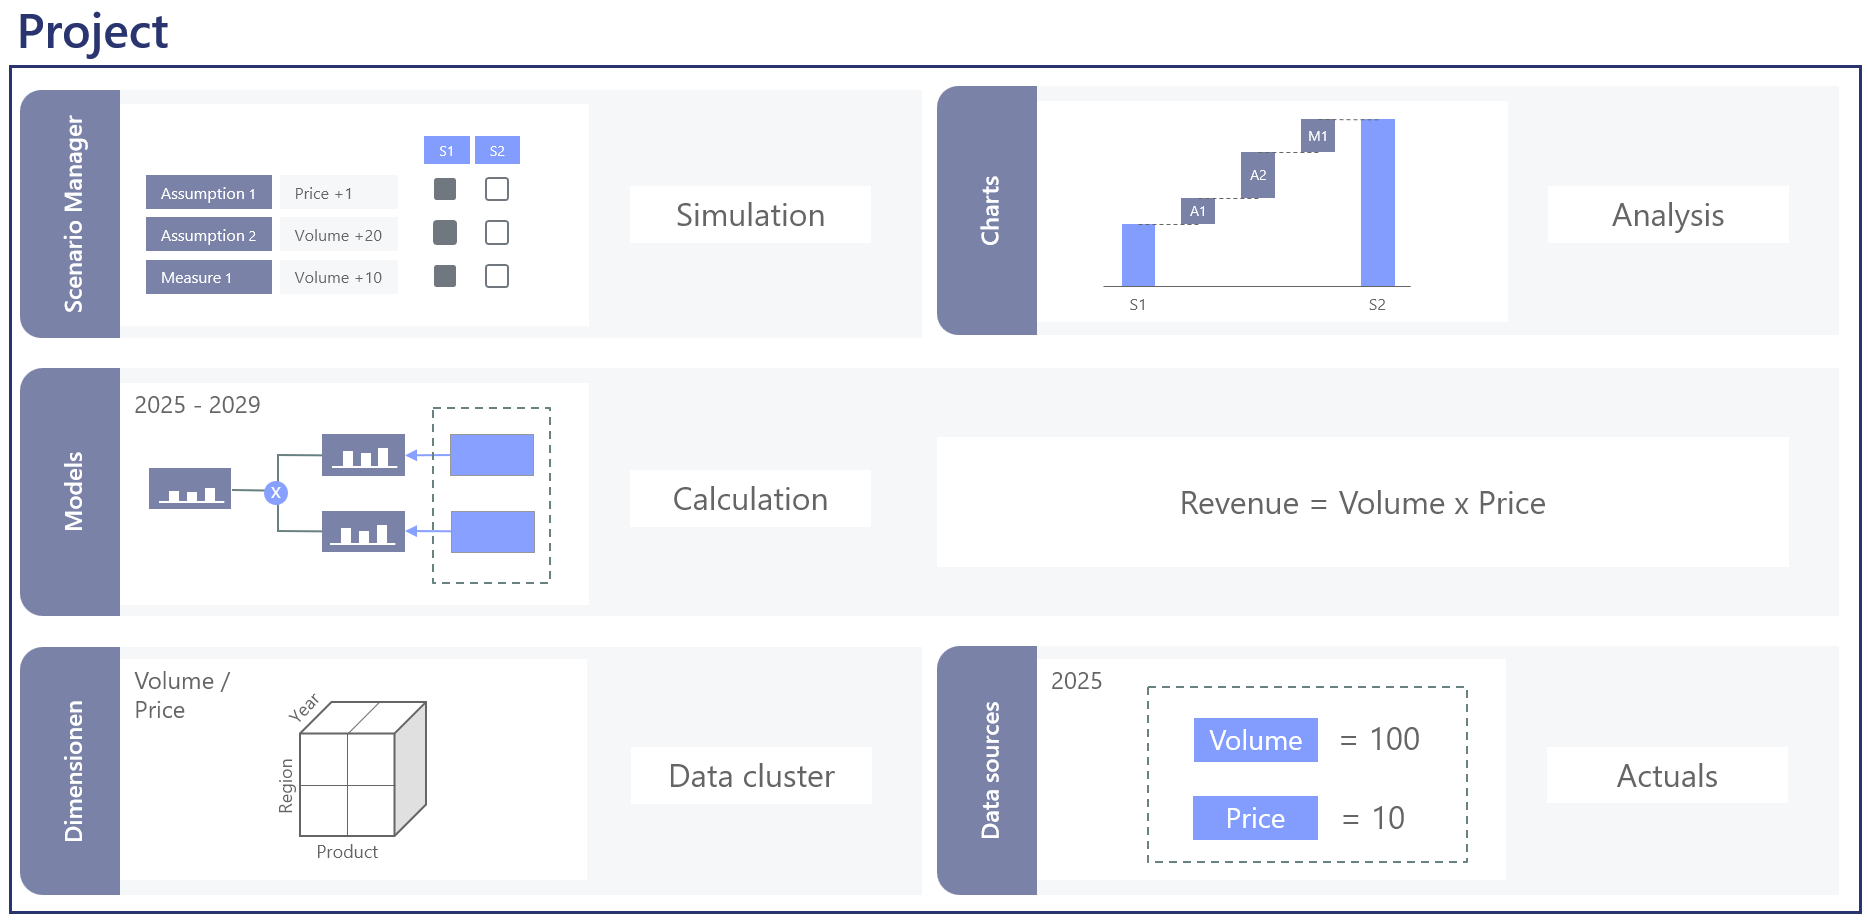
Projects in Valsight are the top-level containers that bundle together dimensions, data sources, models, workspaces, and scenarios for a specific planning use case.
For detailed reference on any of the concepts here, see Projects.
Watch the video guide
Step 1: Open the project overview
After logging in to Valsight, the Project overview appears. This is the start page that lists all projects you have access to.
Step 2: Create a new project
- Click Add in the upper right corner of the project overview.
- Enter the following details:
| Field | Value | Notes |
|---|---|---|
| Name | Revenue Planning Tutorial | Choose a descriptive name. |
| Business Key | REVENUE_TUTORIAL | This must be unique. |
Step 3: Set the time horizon
Configure the time horizon in the project creation dialog:
| Setting | Value | Notes |
|---|---|---|
| Horizon Period | Year | Can also be Month or Quarter. |
| From | 2025 | The first year in your data. |
| To | 2029 | The last year of your planning horizon. |
Step 4: Save the project
- Click Create.
- The project appears in the project overview.
- Click the project name to open it.
After opening the project, you will see an empty project with sections for workspaces, models, dimensions, and data sources.
What you have done
- Created a new project called
Revenue Planning Tutorial - Set the time horizon to years from 2025 to 2029
- Opened the project, ready for the next steps
Next step
Continue to Part 2: Set Up Dimensions.